SAP system provides two procedures for processing withholding tax; the “Standard” and the “Extended” withholding tax. We’ll walk you through on the basic configuration steps of the latter procedure.
1. First, Check Withholding Tax Countries:
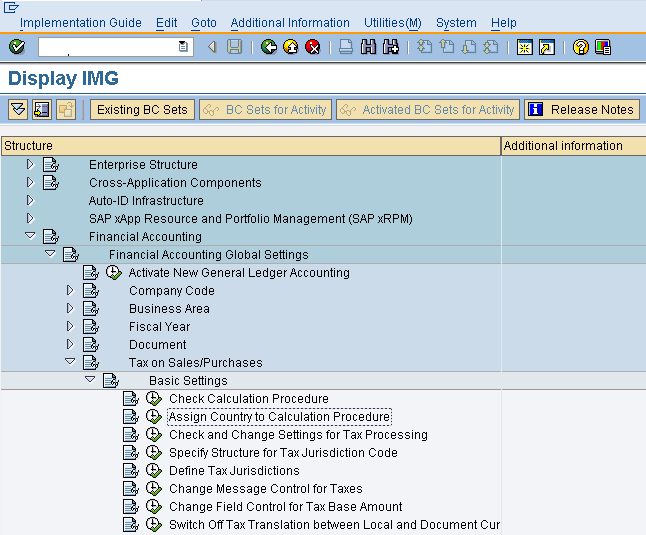
Path: IMG → Financial Accounting (New) → Financial Accounting Global Settings (New) → Withholding Tax → Extended Withholding Tax → Basic Settings → Check Withholding Tax Countries.
The “Change View Country Key for Withholding Tax: Overview” screen appears. To create new entry, you may copy an existing country key by selecting the Copy button or you may create from scratch by selecting New Entries button.
Fill up the following fields:
- Country Key (Cty) – e.g. PH
- Withholding Country Key (WCty) – e.g. PH
- Description – e.g. Withholding Tax – Philippines
2. Second, Define Withholding Tax Keys. These are codes use to identify the different withholding tax types of each country.
Path: IMG → Financial Accounting (New) → Financial Accounting Global Settings (New) → Withholding Tax → Extended Withholding Tax → Basic Settings → Define Withholding Tax Keys.
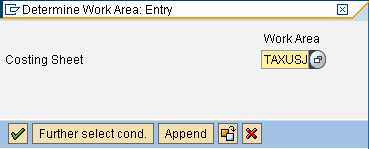
A pop-up window “Determine Work Area: Entry” appears. Enter your country code, e.g. ‘PH’. Then select Enter button or press Enter on your keyboard.
The “Change View Official Withholding Tax Key – Descriptions: Overview” screen appears. To create new entries you may copy an existing tax key by selecting Copy button or you may create from scratch by selecting New Entries button.
Fill up the following fields:
- Official Withholding Tax Key (Off. Key) – e.g. ‘C010′.
- Text 40 (Name) – Professional talent fee paid to juridical person <=720,000.
3. Third, Define Withholding Tax Type. Note that with “Extended Withholding Tax Procedure”, withholding tax can be computed by the system during invoice processing or during posting of payments. Furthermore, the withholding tax on partial payments can also be computed or determined by the system automatically.
Path: IMG → Financial Accounting (New) → Financial Accounting Global Settings (New) → Withholding Tax → Extended Withholding Tax → Calculation → Withholding Tax Type → Define Withholding Tax for Invoice Posting (or for Payment Posting).
A pop-up window “Determine Work Area: Entry” appears. Enter your country code, e.g. ‘PH’. Then select Enter button or press Enter on your keyboard.
The “Change View Define Withholding tax type: Posting at time of invoice” screen appears. On the said screen, you may create through copy an existing tax type or you may create from scratch. Select the Copy button or New Entries button.
Fill up the Withholding Tax Type and Description fields. All other fields are already standard and more or less fit to your withholding tax requirements in your country.
4. Fourth, Define Withholding Tax Code. The tax code you create in this step should be assigned to the withholding tax type and withholding tax key created from the preceding steps. Furthermore, you enter also the tax rate and the base amount of computation.
Path: IMG → Financial Accounting (New) → Financial Accounting Global Settings (New) → Withholding Tax → Extended Withholding Tax → Calculation → Withholding Tax Code → Define Withholding Tax Code
A pop-up window “Determine Work Area: Entry” appears. Enter your country code, e.g. ‘PH’. Then select Enter button or press Enter on your keyboard.
The “Change View Withholding tax code: Details” screen appears. You may copy an existing tax code or you may create from scratch.
Fill up the following fields:
- Withholding tax type – assign a withholding tax type you’ve created in step 3.
- Withholding tax code – create your withholding tax code.
- Description – Enter description of your withholding tax code.
- Official Withholding tax key – assign a withholding tax key you’ve created in step 2.
- Percentage subject to tax (Base amount) – normally, 100% of the base amount is subject to tax.
- Posting indicator – normally select ’1′ which means, there is one line item entry for the withholding tax and the amount is deducted fromt the line item of customer, vendor, or cash account.
- Withholding tax rate – enter the tax rate of the tax code. This will use by the system to compute the amount of tax during processing.
5. Fifth, Assign Withholding Tax Types to Company Codes. Here, you assign the withholding tax types created in step 3 to your Company Code.
Path: IMG → Financial Accounting (New) → Financial Accounting Global Settings (New) → Withholding Tax → Extended Withholding Tax → Company Code → Assign Withholding tax type to Company Code.
The “Change View Withholding tax information for company code per w/tax type” screen appears. You may copy an existing company code assignment or you may assign from scratch.
6. Sixth, Activate Extended Withholding Tax for your Company Code. Remember, the activation of this tax procedure is on the company code level. You can’t use this tax procedure to your company code, unless activated.
Path: IMG → Financial Accounting (New) → Financial Accounting Global Settings (New) → Withholding Tax → Extended Withholding Tax → Company Code → Activate Extended Withholding Tax.
The “Change View Enhanced withholding tax functions active: Overview” screen appears. To activate, tick the check box “Ext. w/tax” of your company code.
7. Finally, Define G/L Accounts for Withholding Tax. In this step, you assign the G/L account for Withholding tax posting.
Path: IMG → Financial Accounting (New) → Financial Accounting Global Settings (New) → Withholding Tax → Extended Withholding Tax → Posting → Accounts for Withholding Tax → Define Accounts for Withholding Tax to be Paid Over.
A pop-up window “Enter Chart of Accounts” appears. Enter the Chart of Accounts code then select Enter button or press Enter on your keyboard.
The “Maintain FI Configuration: Automatic Posting – Accounts” screen appears. Select the G/L account you want to assign for withholding tax postings.
Note, for every step above don’t forget to save your work. Select Save button or Ctrl+S after each step.